Friday, December 3, 2010

Final Assignment Part 2

This is my first self portrait.  I am not sure how much different it is, but I know that it is different in material and concept.  Although I have never been afraid to experiment with shapes shading.  I don't think I really had a grasp of negative and positive space and shading.  I also didn't really have a clear grasp on perspectives. 


       I chose a traditional 3 point perspective landscape with a a non traditional abstract twist.  I have become a tree.  Basically the tree of my life and what surrounds me are the leaves of my life, representing the years of my life both good and bad.  I chose to use mostly positive space, with some aspects like the sky representing a negative space background.  The shading of the tree is dark and has textured lines which create the bark to look more life like. I did this because I wanted it to stand out among the landscape background.  The tree is in the foreground, with the mountains in the back as middle ground and also provide a vanishing point. The sky of course is the background. 
      Comparing it with my first self portrait it is somewhat different, in that I would have never felt confident enough to place my self image within the picture before.  But after taking this course I have learned that this is an expression of art. My art and art can be anything an artist choses it to be, "it is all in the eyes of the beholder."
This has definitely been a challanging class and I have certainly learned a lot about art as well as my abilities to draw and understand art. 

Thursday, December 2, 2010

Final Assignment Part 1

For our final assignment we are to do a self portrati of ourselves in a contour line drawing.  Here is my rendition of my self portrait in a contour line drawing.
This was my first attempt not understanding that I could do a frontal view I struggled with this first attempt at a contour line drawing of myself. 

I then tried a second attempt with a frontal view. 
Better, but not great.  So I tried a third attempt.  This one I was pleased with. 

This is my third attempt at a contour line drawing.  I really wanted to shade and create shadows, but this is what the expectations were for this particular project.  The nose gave me such a heck of a time.  I think I spent an hour on my nose alone.


Paper bag Part 2

Using Conte Crayon and a view finder I now focused on one specific area as I had done before, but blowing it up so that only it fit in my view finder. 
Same thing only using graphite pencils and view finder. 

Sunday, November 21, 2010

Week 11 Multiple Planes on a Paper Bag!

This was a real challenge for me this week.  We had to take a large or small paper bag and cumple it up, place under some lighting and draw everything we saw.  I liked working with the conte crayon better as it covered more area and was easier I think to use when shading was needed.  The pencils were more difficult and took much more time to use. 

This is my large paper bag laying on it's side.  Conte crayon was used as the medium and white drawing paper.  Not an easy task.


Here is my bag standing up using graphite pencil.  This took me hours to do.  Yikes and I am still not very pleased with it. 
One thing I have learned from this lesson is you can't rush it.  You must take your time and draw what you see in order for it to come out looking similar to the bag.  You can't rush art.  One very valuable lesson I have learned through the course of this class.

Saturday, November 13, 2010

Perspecitves and Planes

Week 10 Perspectives/Planes/Points of View
This week our goal was to understand 1,2 and 3 point perspectives in art work.  We were also given information on birds eye view and an ant view.  Here are my interpretations of the just mentioned tasks.

Here is my demonstration of a 3 point perspective.  Hopefully you can see the cone on your left is one perspective and then the teapot on the right is the opposite perspective and the ball on top of the cube is the last perspective. 


Here is my example of a two point perspective.  The ball on the left and hopefull the cylinder on the right have caught your eye as they are on the same plane. 


Here is my example of a vanishing or one point perspective.  The ball should be the focal point and everything behind it kind of fades away.


Here is my example of the bird's eye view.  This was rather difficult for me as when you draw you don't think about how things look from this perspective.  The most difficult task was making the cone look accurate and I struggled with it.  I had to take several steps back and make sure I got it right.


Last but not least here is my perspective on the Ant's view.  This was also rather difficult again because I had to continually look back and take a step back to make sure I was drawing what I saw and not what I think I saw.  Another long challenge for me.
That concludes this weeks assignment.

Monday, November 8, 2010

Paper and Color

Week 9 was all about color and the artist by the name of Matisse.  Here is my masterpiece although for some reason I have totally screwed up this assignment.  Here it is for what it is worth. 
This was a challenge as we had to stay within the realm of the color pallette using complimentary colors or contrasting colors.  I do have a foreground, middle ground and background, but really wished my thought process was in a better place.  I felt rushed and this by far is not my best work.

Friday, November 5, 2010

Week #8 Texture

Still life drawing with Conte Crayon.  Using as a template.

This texture was used by slicing a roasting potatoe in half and then cutting lines in the potato and then dipping it in the ink. 


This texture is the siding on the side of my house.  I used a piece of charcoal for this rubbing.
Ink and the rim of a candle holder for this type of texture.


Charcoal on brick texture rubbing.

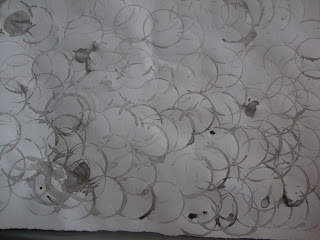
Paper towel dipped in ink.  This was actually interesting as it ended up being a lot lighter in color than I expected it to.  It went on dark, but when it dried it was rather light.


Number 2 graphite pencil on textured wall paper.   Not much came through on this one.


Here is my final project withusing my texture prints. This was an absolute challenge and took days to complete.  It isn't as acurate as I would have liked, but I am pleased with my end result.


Tuesday, October 19, 2010

Week Six The Artful Lines


This week we were asked to work with contour line drawings.  The first task was to tear our newprint paper into quarters and using a marker or brush and ink.  We then had to use these mediums to draw a still life object.  I chose my favorite tea pot.  I liked the way the ink and brush flowed on the paper.  I didn't like using the marker as much although I cold put more detail into the drawing.  Not detail in general but more finite details.
This was a very good primer for the rest of our project.  The next step was to take a #2 pencil and draw the still life as a slow contour, quick contour and a cross contour.  We then also had to draw a general contour line.  Here is the still life setting I used to draw each of these drawings.

Here is an example of a quick contour line drawing. I really didn't like using the pencil as much as the other materials we have used in the past. 


Here is an example of a contour line drawing.  Less detail and hard to see sorry!


Here is an example of slow contour line drawing.  I hate the way the teapot looks.  But honestly I did focus on the lines as oppossed to how the drawing is looking.

Here is an example of my cross contour line.  I really struggled with this part of the project.  The concept was difficult for me and it challenged me over and over again how to best portray the picture as accurately as possible.  This was the best one out of the bunch of cross contours I did.  I got lost in this procedure.


Here is my final contour line drawing on white paper.  This week was a challenge for me.  But I do understand the need to understand the lines of things.


Monday, October 18, 2010

Still Life Objects and values

Here are my individual objects showing value. 
Cone Shape!


The single item I chose to take a picture of and show the value drawing.


Cylinder


Cube


Rectangle


Contour line drawing and sketch before final drawing.

Final drawing showing values and shading. 

Week #4 Gestures/Positive& Negative/Contour line

Gesture Drawings.  On my first attemps it was difficult to relax and just look at the way things are moving and shape of the figure.
The object to gesture drawings is that you need to relax and just follow flow of movement and lines of movement and let go.  Draw what you see not what you think you see.

This is a phote of the area in which I used for my contour line drawings.


Contour line drawing.


Organizational Line drawing.  My favorite.


Blind Contour Drawing.


Negative space contour line drawing.


Positive Space Contour line Drawing.


Values and planes in this overlapping furniture picture.